How to Install Jenkinks 2.0 in Ubuntu
Jenkins is one of the most popular open-source automation/build servers with a lot of plugins to support building, deploying, and automating any project.
Prerequisites
- Java 11
Install Jenkins
Installing jenkins from repository in ubuntu 16.04.6 server requires repository list modification to install and receive updates for Jenkins itself. To start the installation process we need to add the jenkins official repository key to the system
wget -q -O - https://pkg.jenkins.io/debian/jenkins-ci.org.key | sudo apt-key add -When the key is added to the system, it will return OK.
Next, we will add jenkins repository to the system’s repository list
echo deb https://pkg.jenkins.io/debian-stable binary/ | sudo tee /etc/apt/sources.list.d/jenkins.listOnce the repository has been added to the system list, we will update the repository index by running
sudo apt-get updateThis will update the system repository index and jenkins repository will be used by apt-get. Finally, We will install jenkins itself and its dependencies
sudo apt-get -y install jenkinsNow that Jenkins and its dependencies are in place, we can start the Jenkins server. Using systemctl we can start jenkins
sudo systemctl start jenkinsTo check the status of jenkins use
sudo systemctl status jenkinsIf everything is okay and Jenkins started properly, the output should be something like below
● jenkins.service - LSB: Start Jenkins at boot time
Loaded: loaded (/etc/init.d/jenkins; bad; vendor preset: enabled)
Active: active (exited) since Fri 2019-04-26 12:02:46 CEST; 5min ago
  Docs: man:systemd-sysv-generator(8)
Setup Jenkins
Once the Jenkins service is up and running. Open a browser and type the following in the address bar
http://<your_sever_ip>:8080This will open the Jenkins installation window. For the first use, it will ask for authentication (see the image below)
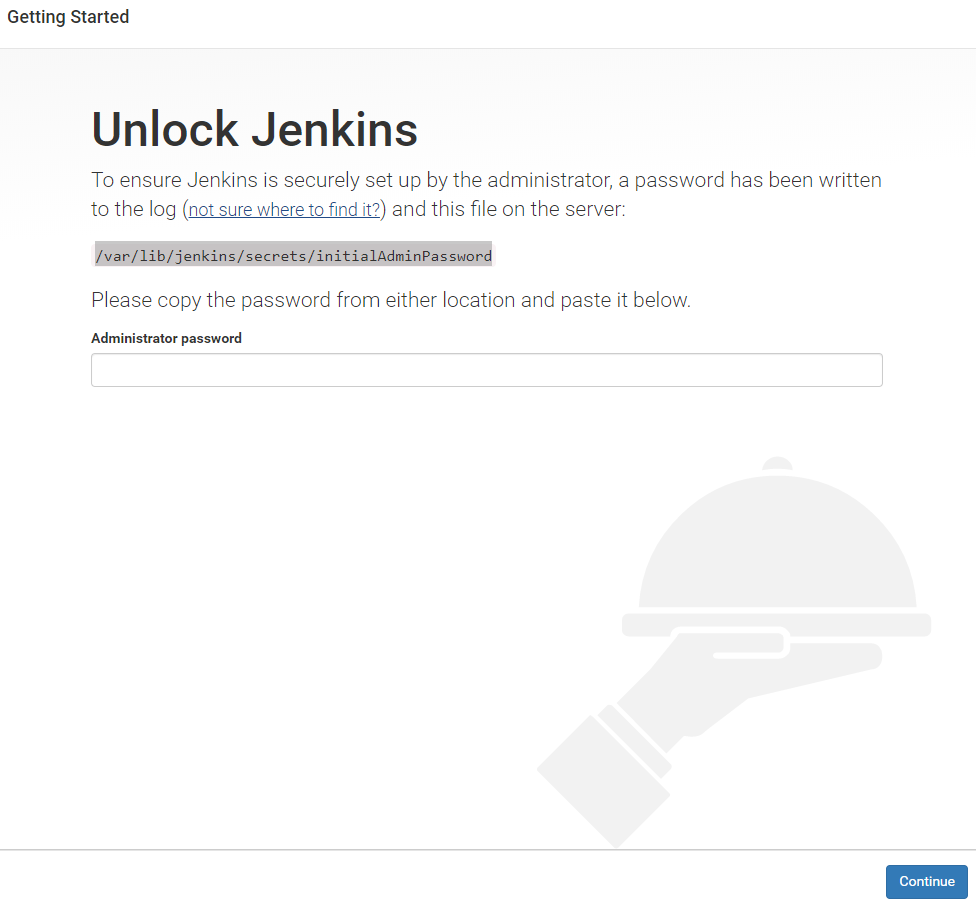
After authentication, follow on-screen instructions to set up Jenkins
Bind Jenkins to 127.0.0.1
Jenkins can be bound to listen to a specific host by modifying the default Jenkins configuration file located at /etc/default/jenkins in Ubuntu systems.
Add a variable to the file called HTTP_HOST=127.0.0.1 then pass it as a value of the argument flag --httpListenAddress for JENKINS_ARGS
JENKINS_ARGS="--webroot=/var/cache/$NAME/war --httpPort=$HTTP_PORT --httpListenAddress=$HTTP_HOST"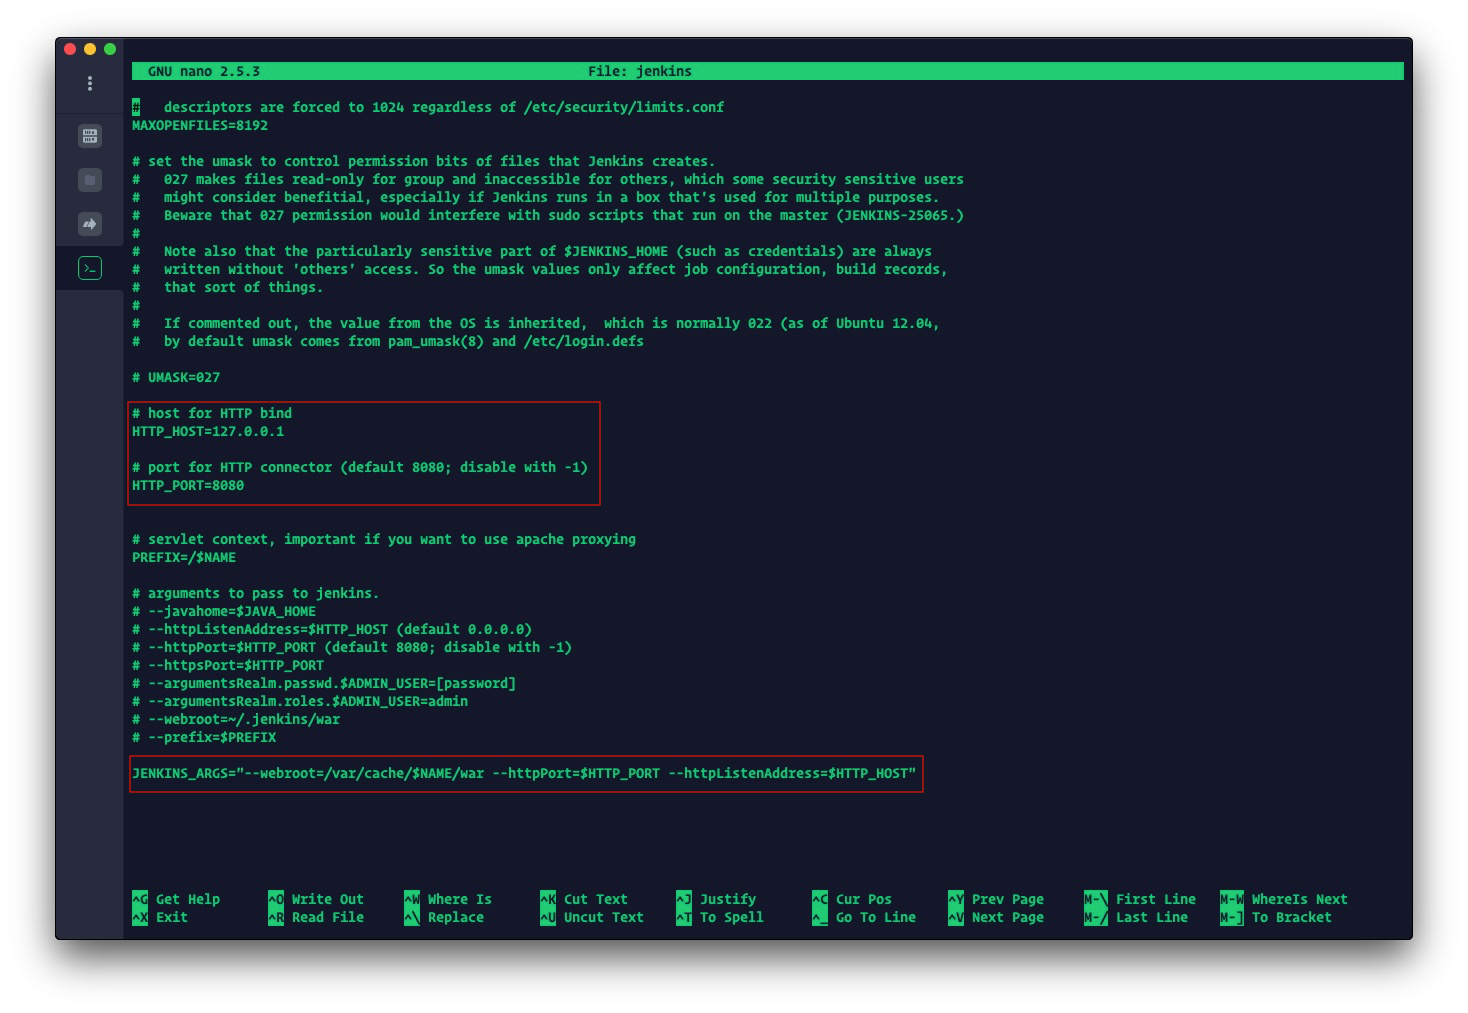
Fix jenkins User Pemissions
To make sure that jenkins user can access/have appropriate rights to run all the commands necessary, first run
sudo visudoThe file will be opened with vi editor. If you want to open the file in any other editor like nano use the following syntax
sudo EDITOR="nano" visudoAdd the following line to the sudoers file and save (ctrl+o and ctrl+x) it.
jenkins ALL=(ALL) NOPASSWD: ALLAfter exit, restart/reboot or log out and log in to the system to apply these settings.
Enjoy!