How to Generate Self Signed SSL Certificates
!WARNING!
Self-signed certificates should not be used in production.
Almost all the websites nowadays have https enabled and it’s really useful to have https enabled environment while developing. Getting an https enabled environment might cost you money but there is an alternate way of enabling https with self-signed certificates.
In this post, we are going to see how we can create self-signed certificates for web services. We will not discuss the complex topic of certificate signing and signing authorities.
Step 01
Creating a ROOT SSL should be the first step so that we can use this particular certificate to sign any number of certificates for all the necessary domains that we might have.
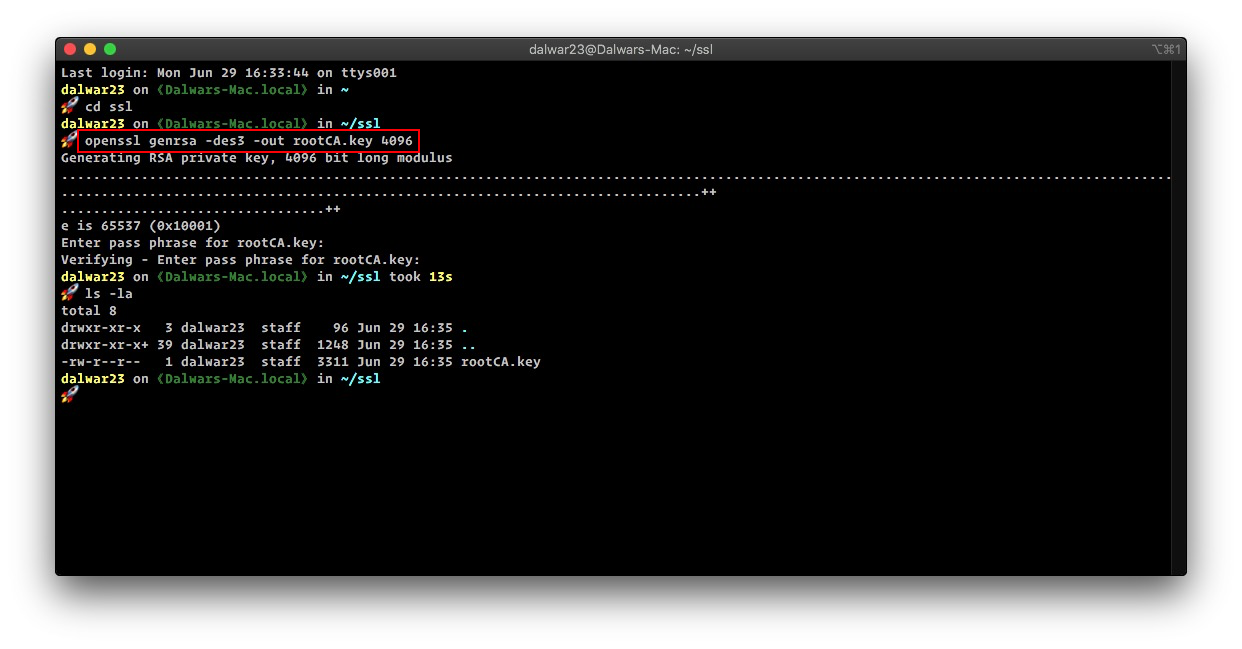
First, we need to generate a key named rootCA.key then, we will use this key to generate the ROOT SSL certificate.
NOTE
A passphrase is required to generate the key. Choose something complex, something that is hard to guess, and keep it saved in a safe place.
openssl genrsa -des3 -out rootCA.key 4096This will generate a 4096 bit RSA key as shown in the image below
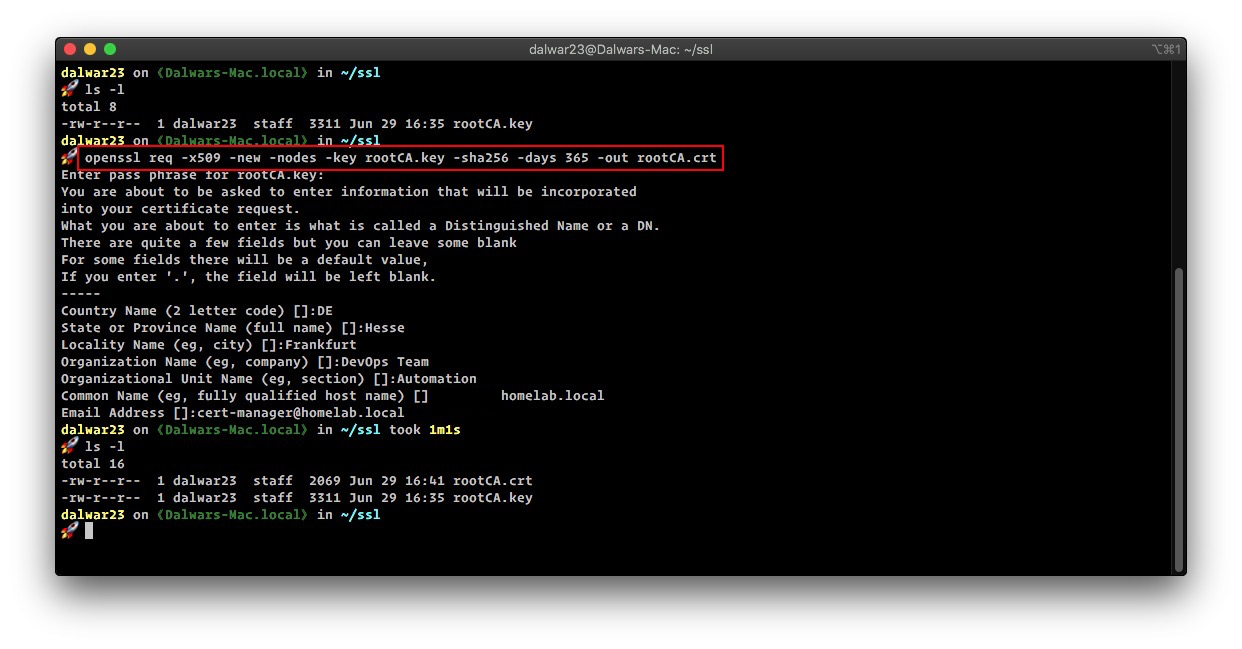
Now, we will use this generated key to generate the ROOT SSL certificate named rootCA.crt. It’s also possible to define the expiration time of the key, in this example, we will set it for 01 year or 365 days.
IMPORTANT
From September 01, 2020, google chrome and apple’s safari browser will no longer support certificates that have a validity period of more than 398 days. 365 days plus the grace period. See this article from apple and this article from the sslstore that says google chrome will do the same.
openssl req -x509 -new -nodes -key rootCA.key -sha256 -days 365 -out rootCA.crtOnce all the questions are answered, it will generate the rootCA.crt SSL certificate.
Step 02
In this step, we have to install/trust the newly generated rootCA.crt into our system, to do that please use the following guidelines from this blog post.
Step 03
Now we can use this root SSL certificate to issue locally useable SSL certificates for local use in development or staging environments.
Let’s create an OpenSSL configuration file named homelab.local.csr.cnf. I have used my desired domain name as a prefix to .csr.cnf. Use a text editor to open the file
nano homelab.local.csr.cnfAdd the following lines to the file, save and exit.
[req]
default_bits = 4096
prompt = no
default_md = sha256
distinguished_name = dn

[dn]
C=DE
ST=Hessen
L=Frankfurt
O=DevOps Team
OU=Automation
emailAddress=cert-manager@homelab.local
CN = staging.homelab.local
HINT
Please change [dn] entries to match your requirements, specifically the CN entry. This is the domain name that the certificate will be valid for.
For the new browsers to accept the certificates it’s recommended to use X509 V3 certificates with an attribute named subjectAltName in subj of the certificate creation request.
So let’s create the configuration file named v3.ext. Use a text editor to open this new file
nano v3.extAdd the following content to the file, save and exit.
authorityKeyIdentifier=keyid,issuer
basicConstraints=CA:FALSE
keyUsage = digitalSignature, nonRepudiation, keyEncipherment, dataEncipherment
subjectAltName = @alt_names

[alt_names]
DNS.1 = staging.homelab.local
NOTE
Consider the input at DNS.1 entry, this should be an alternate name if required can be used as DNS.2=anothername.
Step 04
Now we will create a certificate key for staging.homelab.local using the configuration file that we created earlier.
openssl req -new -sha256 -nodes -out staging.homelab.local.csr -newkey rsa:4096 -keyout staging.homelab.local.key -config <( cat homelab.local.csr.cnf )The above command will generate an SSL certificate key named staging.homelab.local.key.

Finally, we can request a certificate signing with the root ssl certificate to generate a domain certificate for staging.homelab.local. We will also define the expiration of this certificate to 1 year.
openssl x509 -req -in staging.homelab.local.csr -CA rootCA.crt -CAkey rootCA.key -CAcreateserial -out staging.homelab.local.crt -days 365 -sha256 -extfile v3.extNOTE
The Root certificate key passphrase is required at this stage again.
If everything is in place this should generate the domain certificate named staging.homelab.local.crt.

Step 05
Use the staging.homelab.local.crt and the staging.homelab.local.key in your server configuration(s) to use https.
NOTE
LOCAL DNS or hosts file should resolve the domain name to the desired IP address.
Automation
If you require to sign a lot of certificates for a different environment, then this process of creating a request and signing get tiresome really fast and to address this issue, here is a little shell script to automate these processes – (change the script to your likings…..)
#!/bin/bash

# author: Dalwar Hossain (dalwar23@protonmail.com)

# Check is domain name provided or not
if [ "$#" -ne 1 ]
then
	echo "=> Usage: /bin/bash generate_certificate.sh <fqdn>"
	exit 1
fi

# Assign the domain name to a variable
FQDN=$1

# rootCA certificate and key files
ROOTCA_CRT=../rootCA.crt
ROOTCA_KEY=../rootCA.key

# Validity of the certificate (365 days = 1 year)
VALIDITY=365

# Create directory and change path to the newly created directory
echo "=> Creating required directory....."
mkdir $FQDN
echo "=> Changing to newly created directory....."
cd $FQDN

# Create necessary files
echo "=> Creating certificate request configuration file....."
cat > $FQDN.csr.cnf << EOF
[req]
default_bits = 4096
prompt = no
default_md = sha256
distinguished_name = dn

[dn]
C=DE
ST=Hesse
L=Frankfurt
O=DevOps Team
OU=Automation
emailAddress=cert-manager@homelab.local
CN = $FQDN
EOF

echo "=> Creating v3 extension configuration file with subjectAltName....."
cat > $FQDN.v3.ext << EOF
authorityKeyIdentifier=keyid,issuer
basicConstraints=CA:FALSE
keyUsage = digitalSignature, nonRepudiation, keyEncipherment, dataEncipherment
subjectAltName = @alt_names

[alt_names]
DNS.1 = $FQDN
EOF

echo "=> Generating certificate request key and request file....."
# Create the certificate key and request for a certificate signing
openssl req -new -sha256 -nodes -out $FQDN.csr -newkey rsa:4096 -keyout $FQDN.key -config <( cat $FQDN.csr.cnf )

echo "=> Signing the certificate with rootCA certificate and rootCA key....."
# Sign the certificate with rootCA key and and rootCA certificate
openssl x509 -req -in $FQDN.csr -CA $ROOTCA_CRT -CAkey $ROOTCA_KEY -CAcreateserial -out $FQDN.crt -days $VALIDITY -sha256 -extfile $FQDN.v3.ext

echo "=> Signed certificate and key is available at [$FQDN] directory.
Bonus
If you are using localhost as a development environment and need to create the .crt and .key file really quick, then use the following command to generate the key and the certificate for localhost domain
openssl req -x509 -out localhost.crt -keyout localhost.key \
  -newkey rsa:4096 -nodes -sha256 \
  -subj '/CN=localhost' -extensions EXT -config <( \
   printf "[dn]\nCN=localhost\n[req]\ndistinguished_name = dn\n[EXT]\nsubjectAltName=DNS:localhost\nkeyUsage=digitalSignature\nextendedKeyUsage=serverAuth")
Now install localhost.crt in your list of locally trusted roots as mentioned above in step 02.
Enjoy!